

Homemade Stovetop Beef and Noodles – Cozy, Hearty Family Dinner
Introduction
Few meals are as comforting and filling as a big bowl of Homemade Stovetop Beef and Noodles. This Midwest classic combines tender, slow-simmered beef and thick egg noodles in a savory, rich broth that’s thick enough to coat every bite — like a cross between a stew and a creamy pasta.
Traditionally served at Sunday dinners or during colder months, this dish brings all the homey, old-fashioned goodness of a beef pot roast and combines it with the cozy satisfaction of noodles. It’s one of those recipes that fills the kitchen with warm aromas and leaves everyone asking for seconds.
Perfect for family dinners, leftovers, or meal prepping, stovetop beef and noodles is surprisingly easy to make from scratch — no canned soup or slow cooker required.
Ingredients Overview
Here’s what goes into making this classic beef and noodles recipe, along with helpful tips and swaps:
Chuck Roast or Stew Meat
- Chuck roast is the top choice: it’s affordable, well-marbled, and becomes tender with slow stovetop cooking.
- Stew meat is a shortcut option, though it can be slightly tougher unless simmered longer.
Tip: Cut into bite-sized pieces before cooking for easier serving and quicker cook time.
Egg Noodles
- Wide egg noodles are traditional — they soak up the sauce and hold their texture well.
- Use homemade or store-bought egg noodles (frozen or dried).
Alternatives: Sub with rotini, pappardelle, or gluten-free pasta if needed.
Onion & Garlic
- These aromatics start the flavor base and complement the beef beautifully.
- Dice the onions small and mince the garlic for even cooking.
Beef Broth
- Rich low-sodium beef broth provides a savory foundation.
- Use bone broth for an extra protein and collagen boost.
Worcestershire Sauce
- Adds umami and deepens the flavor without overpowering.
- A splash goes a long way — balance with herbs and broth.
Butter or Oil
- Used for browning the beef and softening the onions.
- Butter adds richness; olive oil keeps it lighter.
Flour or Cornstarch (Thickener)
- A small amount of flour helps create that luscious, stew-like consistency.
- For gluten-free, use cornstarch or arrowroot powder.
Seasonings
- Salt, black pepper, dried thyme, and bay leaf are all you need for old-school flavor.
- Optional: a pinch of rosemary or paprika for extra depth.
Step-by-Step Instructions
This stovetop method is simple, requires one pot, and delivers unbeatable flavor and texture.
1. Brown the Beef
- Heat oil or butter in a large Dutch oven over medium-high heat.
- Season beef cubes with salt and pepper.
- Add to the pot in batches, browning on all sides (about 5–7 minutes per batch).
- Remove and set aside.
Note: Don’t overcrowd the pot — searing in batches ensures caramelized edges and better flavor.
2. Sauté Aromatics
- In the same pot, reduce heat to medium.
- Add diced onion and cook until softened (about 5 minutes).
- Stir in minced garlic and cook for another 30 seconds.
3. Deglaze and Simmer
- Pour in 4 cups of beef broth and scrape up browned bits from the bottom.
- Add browned beef back to the pot along with Worcestershire sauce, thyme, and bay leaf.
- Bring to a boil, then reduce heat to low and cover.
- Simmer for 1.5 to 2 hours, until beef is fork-tender.
Optional: For even thicker broth, whisk in 1–2 tablespoons of flour or cornstarch slurry halfway through cooking.
4. Cook the Noodles
- Once beef is tender, stir in egg noodles.
- Simmer uncovered for 10–12 minutes, stirring occasionally, until noodles are cooked and have absorbed much of the broth.
5. Finish and Serve
- Remove bay leaf and adjust seasoning with salt and pepper to taste.
- Let rest 5 minutes before serving to thicken slightly more.
Tips, Variations & Substitutions
Cooking Tips
- Sear the beef deeply — don’t skip this step. It adds major flavor to the broth.
- Let the soup simmer low and slow for tender beef and a rich sauce.
- Stir the noodles gently to avoid breaking them apart during cooking.
Variations
- Creamy version: Stir in ½ cup of sour cream or heavy cream at the end for a richer sauce.
- Vegetable addition: Add peas, carrots, or mushrooms during the last 15 minutes of cooking.
- Spiced-up version: A pinch of smoked paprika or cayenne adds subtle warmth.
Substitutions
- Beef alternative: Use shredded rotisserie chicken or leftover roast beef to save time.
- Noodle swap: Gluten-free noodles or even spaetzle can work for a fun twist.
- Dairy-free: Use olive oil instead of butter and skip any creamy add-ins.
Serving Ideas & Occasions
This dish is made for sharing — rustic, filling, and full of nostalgic flavor:
- Serve with buttered bread, dinner rolls, or biscuits to soak up the sauce.
- Add a side salad with vinaigrette for a crisp contrast.
- Pair with roasted green beans, steamed broccoli, or glazed carrots for a balanced plate.
Perfect for:
- Sunday dinners
- Fall and winter weeknights
- Meal prepping — it tastes even better the next day
Nutritional & Health Notes
This is a hearty meal, but it can still be part of a balanced diet with a few mindful choices:
- High in protein from beef and egg noodles — great for active days.
- Using whole grain noodles adds fiber and makes it more filling.
- Low-sodium broth and lean cuts of beef help control fat and salt levels.
- Leftovers can be portioned for meal prep lunches throughout the week.
A typical serving (about 1½ cups) contains around 400–500 calories, depending on the beef cut and noodle choice.
FAQs
Q1: Can I use a different cut of beef?
A: Yes. Chuck roast is best, but stew meat, top round, or even brisket can work. Just make sure to simmer long enough until tender.
Q2: Can I use pre-cooked noodles?
A: It’s better to cook noodles in the broth so they absorb flavor and help thicken the sauce. Pre-cooked noodles may get mushy.
Q3: Can I make this in advance?
A: Absolutely. This dish reheats beautifully and tastes even better the next day. Store in the fridge for up to 4 days.
Q4: How do I thicken the broth?
A: Letting the noodles cook uncovered helps reduce the broth naturally. You can also stir in a slurry of 1 tbsp cornstarch + 2 tbsp water during the last 5 minutes.
Q5: What’s the best way to reheat leftovers?
A: Reheat on the stovetop over low heat with a splash of broth or water. Stir gently to keep the noodles intact.
Q6: Is this freezer-friendly?
A: Yes, but freeze before adding noodles. Cook noodles fresh when ready to eat for the best texture.
Q7: Can I make this in a slow cooker?
A: You can! Sear beef first, then add to the slow cooker with broth and seasonings. Cook on low for 6–8 hours, then add cooked noodles before serving.
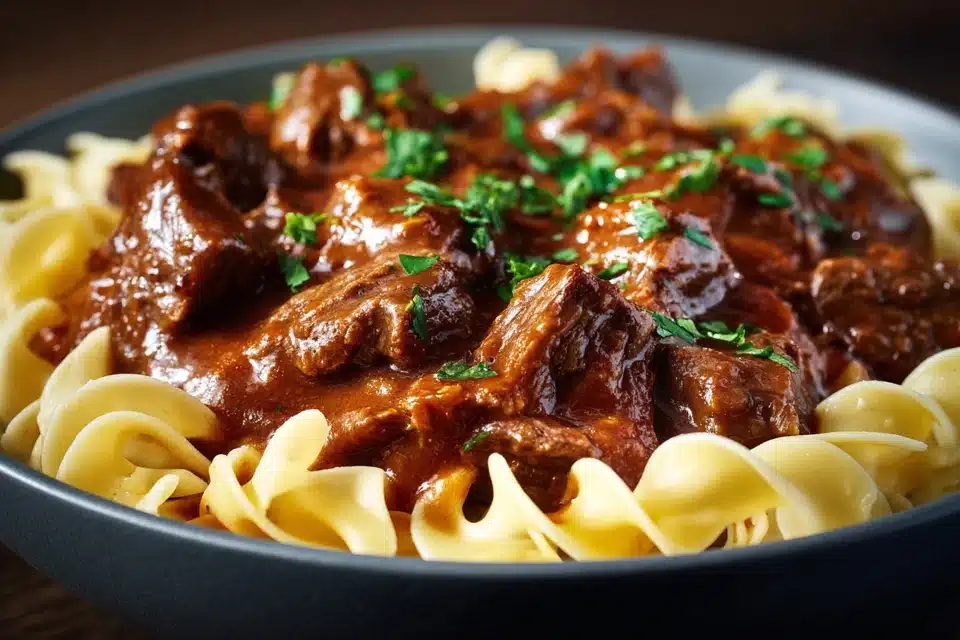
Beef and Noodles Recipe with Tender Stew Meat
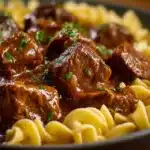
Hearty and comforting, this stovetop beef and noodles recipe features tender beef simmered in savory broth and tossed with wide egg noodles. The perfect one-pot dinner for cozy nights.
- Prep Time: 15 minutes
- Cook Time: 2 hours
- Total Time: 2 hours 15 minutes
- Yield: 6 servings 1x
Ingredients
- 2 lbs chuck roast, cubed
- 2 tbsp oil or butter
- 1 medium onion, diced
- 3 cloves garlic, minced
- 4 cups low-sodium beef broth
- 2 tsp Worcestershire sauce
- 1 tsp dried thyme
- 1 bay leaf
- Salt and black pepper to taste
- 12 oz wide egg noodles
- Optional: 1 tbsp flour or 1 tsp cornstarch + water
Instructions
- Season and sear beef in oil or butter until browned. Set aside.
- Sauté onion and garlic until soft. Deglaze with a splash of broth.
- Add beef, remaining broth, Worcestershire, thyme, and bay leaf. Simmer covered 1.5–2 hours.
- Stir in egg noodles and cook uncovered 10–12 minutes until tender.
- Remove bay leaf. Adjust seasoning and serve warm.
Notes
- For a thicker broth, mash some noodles or use a cornstarch slurry.
- Add carrots, peas, or mushrooms for extra veggies.
- Store leftovers in the fridge up to 4 days.