
Crispy Chilli Beef with Rice – Takeout-Style Sweet Heat at Home
Introduction
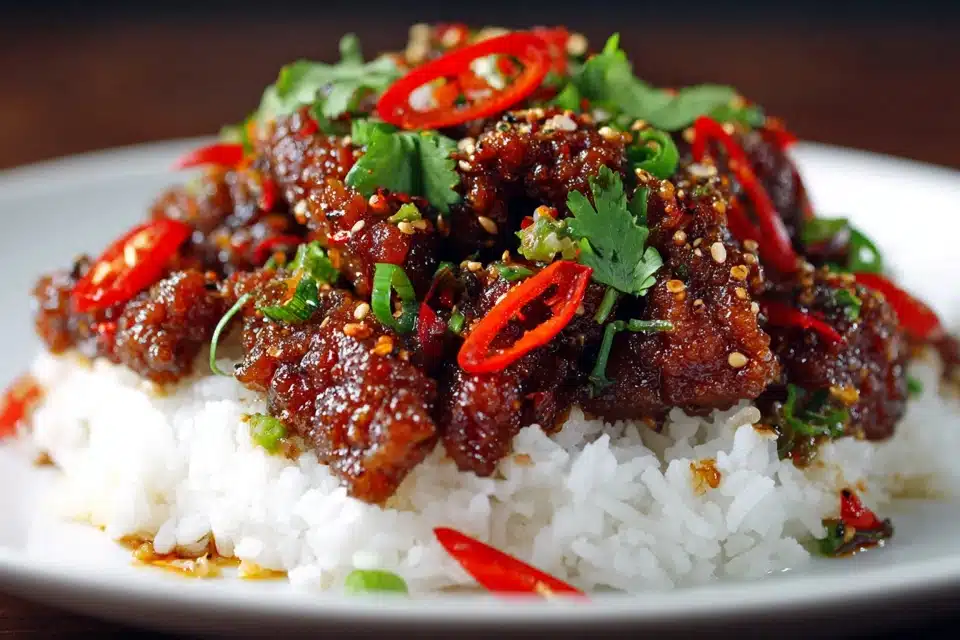
Crispy Chilli Beef is a bold, addictive dish that combines crunchy strips of fried beef with a glossy, sticky-sweet chilli sauce — served over fluffy white rice for the ultimate comfort bowl. A staple in Chinese takeout menus (particularly in the UK), this dish is known for its contrast: crispy meat meets tangy, fiery glaze.
What makes Crispy Chilli Beef truly unforgettable is its texture — the beef is thinly sliced, lightly coated, and fried until golden and crisp. Then it’s tossed in a bright, garlicky sauce with just the right kick from fresh chilli and a balance of sweetness from sugar and soy.
Paired with steamed rice, the sauce seeps into each grain, delivering flavor in every bite. With this easy home version, you’ll skip the delivery fees without sacrificing a single crunch.
Ingredients Overview
To recreate this restaurant-style Crispy Chilli Beef with Rice, you’ll need a mix of everyday pantry staples and a few key Asian condiments:
- Beef (Rump, Flank, or Sirloin): Thinly sliced against the grain for tenderness. Flank steak is a great affordable choice.
- Cornstarch: Creates a crisp outer shell when fried.
- Egg White: Helps the cornstarch adhere for better crisping.
- Oil (for Frying): Use neutral, high-smoke-point oil like vegetable or canola.
- Garlic & Ginger: Essential aromatics for the sauce base.
- Red Chilli or Chilli Flakes: Adds heat; use fresh red chilli for more depth.
- Bell Pepper: Adds color and crunch.
- Spring Onion (Green Onion): Bright, oniony finish for garnish and flavor.
- Soy Sauce: Salty and umami-rich base for the sauce.
- Rice Vinegar: Balances the sweetness and adds tang.
- Brown Sugar or Honey: Caramelizes slightly and helps the sauce cling.
- Tomato Paste or Ketchup: Adds acidity and sweetness.
- White Rice: Steamed jasmine or basmati rice makes the perfect base.
Ingredient Tips & Swaps
- Gluten-Free: Use tamari instead of soy sauce and confirm vinegar is gluten-free.
- Less Sweet: Reduce sugar or swap with a low-glycemic alternative.
- Make it Mild: Use less chilli or replace with sweet red pepper.
- Add Crunch: Add shredded carrot, julienned cucumber, or crispy shallots on top for texture contrast.
Step-by-Step Instructions
Follow these steps for crispy beef and sticky, flavorful sauce every time:
- Prep the Beef
Slice beef into very thin strips against the grain. This ensures tenderness and allows each piece to crisp up evenly. - Marinate & Coat
In a bowl, toss the beef strips with 1 egg white, 1 tbsp soy sauce, and a generous coating of cornstarch (about 4–5 tbsp). The beef should be dry to the touch and fully coated. - Heat the Oil
Heat oil in a deep pan or wok (enough for shallow frying). Once shimmering hot (around 350°F/175°C), fry beef in batches until golden and crisp, about 3–4 minutes. Drain on paper towels. - Make the Sauce
In a separate wok or skillet, heat 1 tbsp oil. Add minced garlic, grated ginger, and chopped red chilli. Stir-fry for 30 seconds until fragrant. - Build the Sauce
Add 2 tbsp soy sauce, 1 tbsp rice vinegar, 1–2 tbsp brown sugar (or honey), 1 tbsp tomato paste or ketchup, and a splash of water. Let it simmer for 1–2 minutes until slightly thickened and glossy. - Toss the Beef
Add the crispy beef to the sauce along with sliced bell pepper. Toss quickly on high heat so the beef is coated but not soggy — about 1 minute. - Serve Over Rice
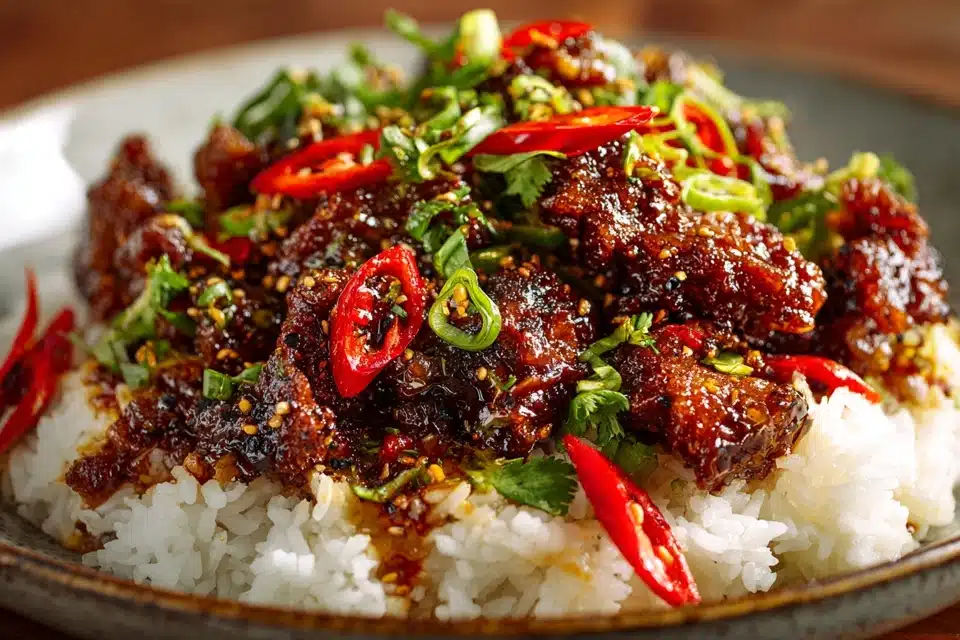
Spoon hot steamed rice into bowls, top with crispy chilli beef, and garnish with sliced spring onions and sesame seeds (optional).
Tips, Variations & Substitutions
- Double Fry for Extra Crisp: Fry the beef twice (first at 325°F, then again at 375°F) for restaurant-style crunch.
- Air Fry Option: Coat beef in cornstarch and lightly spray with oil. Air fry at 400°F for 10–12 minutes, flipping halfway.
- Vegan Version: Use crispy tofu or jackfruit instead of beef.
- Add Veggies: Snow peas, baby corn, or water chestnuts add crunch and color.
- More Heat? Add a spoon of sambal, sriracha, or crushed red pepper to the sauce.
Regional & Style Twists
- Chinese Takeaway-Style: Slightly sweeter with a red sauce made from ketchup and sugar.
- Sichuan-Inspired: Add dried Sichuan peppercorns and dark soy for more complexity.
- Korean Fusion: Add gochujang to the sauce and top with pickled radish for zing.
Serving Ideas & Occasions
Crispy Chilli Beef Rice is a bold and satisfying dish, perfect for:
- Weeknight Cravings: Ready in under 40 minutes, but tastes like restaurant fare.
- Casual Dinner Parties: Impressive presentation with minimal effort.
- Weekend “Fakeaway” Night: Serve with homemade spring rolls or dumplings.
Best served with:
- Steamed jasmine or sticky rice
- Stir-fried greens like bok choy or Chinese broccoli
- Cucumber salad with sesame dressing
- Light miso or egg drop soup on the side
Nutritional & Health Notes
This dish offers a high-protein, flavorful meal, but it is on the indulgent side due to frying and the sticky sauce.
- Protein: 30g+ per serving
- Calories: ~500–600 depending on oil used
- Carbs: ~40g including rice and sauce
- Fat: Moderate to high; reduce by pan-searing or air frying
Healthier tweaks:
- Use leaner cuts like sirloin
- Serve over cauliflower rice
- Reduce sugar and oil in the sauce
FAQs
Q1: How do I make the beef extra crispy?
A1: Coat it well in cornstarch and egg white, fry in hot oil in small batches, and don’t overcrowd the pan. For ultra-crispy texture, double fry the beef with a brief rest in between.
Q2: Can I prepare this ahead of time?
A2: You can prep the beef and sauce ahead, but wait to fry and toss the beef just before serving to keep it crisp.
Q3: What’s the best cut of beef for this recipe?
A3: Flank steak is best for texture and flavor. Sirloin or rump steak also works well if sliced thinly.
Q4: Can I make it less spicy for kids?
A4: Yes! Omit the fresh chilli and replace with sweet bell peppers. You can always serve chili oil on the side for heat-lovers.
Q5: How do I keep the beef crispy after adding the sauce?
A5: Use high heat and toss quickly—just enough to coat. Too much sauce or time in the pan will soften the coating.
Q6: Is this dish gluten-free?
A6: Not by default, but you can make it gluten-free by using tamari or coconut aminos and a gluten-free vinegar.
Q7: Can I use pre-cooked rice?
A7: Absolutely. Day-old rice is ideal because it’s firmer and absorbs sauce better. Just reheat before serving.
Easy Beef Dinner Crispy Chilli Beef Rice

Crispy slices of beef tossed in a sticky, sweet, and spicy chilli garlic sauce, served over hot rice for a satisfying and crave-worthy meal that’s better than takeout.
- Prep Time: 15 minutes
- Cook Time: 20 minutes
- Total Time: 35 minutes
- Yield: 4 servings 1x
Ingredients
- 1 lb flank or sirloin steak, thinly sliced
- 1 egg white
- 1 tbsp soy sauce (for marinade)
- 4–5 tbsp cornstarch (for coating)
- Neutral oil for frying
- 1 bell pepper, sliced
- 2 garlic cloves, minced
- 1-inch piece ginger, grated
- 1 red chilli, finely sliced
- 2 tbsp soy sauce (for sauce)
- 1 tbsp rice vinegar
- 1–2 tbsp brown sugar or honey
- 1 tbsp ketchup or tomato paste
- 2 tbsp water
- 2 cups cooked white rice
- Spring onions, for garnish
Instructions
- Toss sliced beef with egg white, soy sauce, and cornstarch. Set aside.
- Heat oil in a pan or wok to 350°F. Fry beef in batches until golden and crispy. Drain on paper towels.
- In a clean skillet, sauté garlic, ginger, and chilli in 1 tbsp oil.
- Add soy sauce, vinegar, sugar, ketchup, and water. Simmer 1–2 minutes until thickened.
- Toss in fried beef and bell pepper. Stir-fry quickly to coat.
- Serve hot over steamed rice, garnished with spring onions.
Notes
- Air fry or oven-bake for a lighter version.
- Adjust chilli level to taste.
- Serve with Asian slaw or cucumber salad for contrast.